
Garage flow
1. After you have added items to the Garage Hub, you can find them on the main page. This is where all the vehicle-related information is displayed, including vehicles that you own or have added to the hub (marked as 'shared' or 'created'), as well as those entries that are still in progress or haven't been completed yet (marked as 'drafts').

2. To add a new item, click the ‘+ Add’ button in the top right corner. This will allow you to create a new item with all your vehicle's details.
3. You can filter and search for your vehicles using the features at the top: click ‘All items’ to filter vehicles based on those shared with you, by you, or your items. Use the ‘All items’ drop-down to sort your vehicles, whether they're ones you've entered, shared, or that others have shared with you. Find a particular vehicle quickly with the search bar. Add a new vehicle to your collection by clicking the ‘+ Add’ button at the top right. Manage your vehicles, documents, and details with ease, making your Garage Hub a comprehensive space for all your automotive information.

4. To manage your vehicle information in the Garage Hub, click the three-dot icon beside the vehicle card. A menu will appear with options to view details, share the vehicle information, change the cover photo, or delete the entry if needed. This feature ensures that vehicle management is straightforward and accessible directly from the Garage Hub's main interface.

5. To rearrange the items in your Garage Hub, click and hold the card you want to move, then drag it to a new location. This feature lets you sort your vehicle information in a way that works best for you, whether by make, model, year, or any other order you prefer. It's a convenient way to customize the layout of your Garage Hub for easy access and management.

6. To access details about your vehicle's documents in the Garage Hub, select the vehicle card. This will display all associated information, such as registration and insurance details, on the right-hand panel, allowing you to review and manage your documents easily.
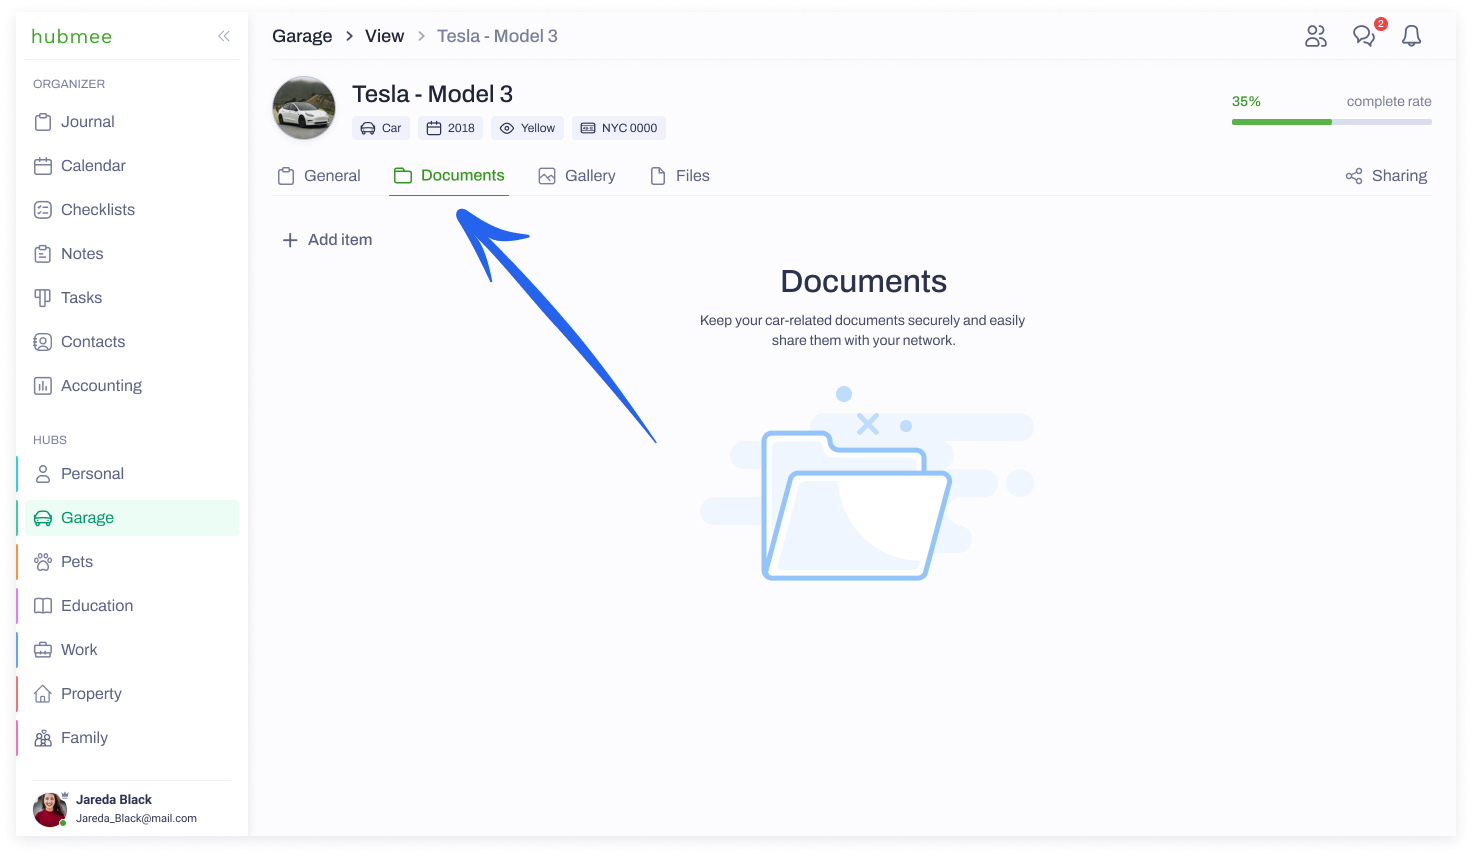
7. To view detailed documents for your vehicle in the Garage Hub, click on the document of interest. This will display all the relevant details in the right panel, including important dates, registration numbers, and other pertinent information.

8. You can edit added information by clicking on the action button (three dots) to view options like 'Edit' or 'Delete'.

9. To add a photo of your vehicle in the ‘Gallery’ section, you can either click on the 'Upload a file' button to select a photo from your device or drag and drop a photo into the designated area.

10. This feature supports image files such as JPG, JPEG, and PNG, up to a size limit of 15 MB. Once uploaded, you can view and organize these images, which helps you keep a visual record of your vehicle within the hub.

11. You can choose the cover picture from your gallery.

12. In the ‘Files’ tab of the Garage Hub, you can easily upload and organize your vehicle-related files.

13. You have the option to drag and drop files directly into the designated area or select files from your device. This feature simplifies document management by allowing you to add, view, and organize important files like insurance papers, registration documents, and service records, all in one place.

14. You can delete all your uploaded files at any time.

15. You can easily share your vehicle information. To share, you can select the sharing icon directly from the vehicle card. Additionally, you can use the action menu, which is accessed by clicking the three dots on the vehicle card, to find more options for managing your vehicle information, including sharing. This makes it convenient to distribute details to others directly from your hub.

16. You can choose someone to share your vehicle details with. Click on the vehicle, and then select ‘Share with’ to choose a person from your list. Once you select the person, you can confirm by clicking ‘Save’. This allows you to easily control who has access to information about your vehicles.

17. You can change sharing permissions for each person. This means you can decide if someone can view, edit, or have to be removed from accessing an item. If you've shared something by mistake, you can remove that person's access. This feature ensures that only the right people have the necessary level of access to your vehicle information.

18. You can share details by clicking the share icon on each vehicle card, or use the action menu for more options. Additionally, you can hover over a vehicle's icon for a pop-up to appear, where you can select people to share with and set their permissions. This feature makes it convenient to control who has access to your vehicle information and how they can interact with it.

19. You can select who to share your item with.

20. Here as well, you can change sharing permissions for each person. This means you can decide if someone can view, edit, or have to be removed from accessing an item. If you've shared something by mistake, you can simply remove that person's access.

21. You can share your vehicle by pressing Sharing on the right side of your screen.

22. Then you can press select from the list bar:

23. Then choose people from your 'Network list':

24. Among the selected people, you can change their edit rights or delete them.

When you select a person in the system, the right side panel will display additional details and actions related to what you have selected. This allows you to see and manage what interactions or permissions you've assigned to them.

26. Those items that don't have crosses - run by default and cannot be managed.
27. Those with crosses can be turned on or off.
